Before taking a new tent camping, set it up at home and go through the full process from setup to repacking. Check the parts, fabric, zippers, and support structure; test the waterproofing or make sure the air beams hold pressure; and place your mattress and essential gear inside to confirm that the layout works.
These problems are harder to solve at a campsite, especially on uneven ground, in fading light, or during bad weather. Even something as simple as not knowing where a valve is or where to attach a guyline can delay the entire setup.
Checking everything at home gives you time to deal with missing parts, damage, unfamiliar steps, and layout problems before the trip. Once you arrive, you can follow a process you already know.
Quick New Tent Checklist Before Your First Camping Trip
Check each item before you leave:
- The tent body, poles, or air beams are complete and undamaged.
- All stakes, guylines, and included accessories are present. For an inflatable tent, check the pump and nozzles as well.
- The fabric, floor, and mesh are free of damage.
- The doors, windows, zippers, buckles, and valves work properly.
- You have completed one full setup according to the instructions.
- The seams show no signs of leaking.
- The air beams of an inflatable tent hold pressure properly.
- The mattress and other gear can be arranged properly inside.
- You know how to use the stakes, guylines, and footprint.
- You can take down the tent and return it to its storage bag.
- The tent is completely dry, and all parts are packed.
- You have checked the weather, site dimensions, and ground conditions.
- You have packed spare stakes and basic repair supplies.
Unpack the Tent and Inspect Its Condition
Remove everything from the packaging and compare each item with the manual or parts list. A standard tent may include the tent body, rainfly, poles, stakes, guylines, and storage bag. For an inflatable tent, also check the included pump, nozzles, valve tools, and repair materials.
Make sure the quantities, sizes, and connections are correct. The nozzle should fit the valve securely, the poles should match their intended positions, and there should be enough stakes and guylines for the main anchor points. Check the bottom of the box and the storage-bag pockets for small items such as dividers, tensioners, and repair patches.
Spread out the tent and inspect the fabric, floor, and mesh for holes, scratches, loose stitching, or unusual wear. Test the zippers, buckles, doors, and windows.
For a pole tent, check the joints, hooks, and sleeves. For an inflatable tent, inspect the valves and outer air-beam sleeves for shipping damage. Photograph any missing or damaged parts and contact the seller before the trip.
Complete a Full Practice Setup
Choose a clean, level area with enough room to unfold the tent. Remove rocks, branches, and sharp debris, then follow the instructions step by step.
Check which way the entrance should face and how much ground space the tent needs. Install or open the vestibule, dividers, awnings, and vents rather than stopping once the main structure is standing.
Secure the base before adding the stakes and guylines. Keep the tension even on all sides. Pulling one side too tightly may cause the tent to lean, distort the doors, or make the zippers difficult to close.
An inflatable tent is not fully set up once it is inflated. The air beams support the structure, while the stakes and guylines help keep it stable in the wind. Practice adjusting the guylines and confirm that the stakes are suitable for the ground at your campsite.
If you use a footprint, make sure it does not extend beyond the tent floor. Exposed edges may collect rainwater and direct it underneath the tent.
Time the setup and note which steps require another person. Knowing the process and dividing the work in advance will make campsite setup easier.
Further Reading: How to Inflate an Inflatable Tent: A Beginner’s Step-by-Step Guide
Test the Waterproofing and Air Beams
A new tent does not always need extra waterproofing. Check the product instructions to confirm whether the fabric, seams, and floor have already been treated. Different materials require different products, so do not apply anything unless there is a clear need.
Inspect the seam tape for lifting, separation, or missing sections. If the instructions allow it, perform a gentle spray test. Do not use a high-pressure stream. Focus on the doors, windows, seams, corners, and floor.
If you find water inside, determine whether it is a leak or condensation. Leaks usually appear in one location, while condensation often covers a larger area of the interior.
Inflate an inflatable tent to the recommended pressure, then leave it in a place with a stable temperature. If the air beams soften quickly, check that the valve is fully closed and free of dust before inspecting the beams for damage.
Lower temperatures can reduce air pressure, so a slightly softer tent at night does not necessarily indicate a leak. Let the fabric, floor, guylines, and footprint dry completely after testing.

Test the Interior With Your Mattress and Gear
A tent may set up correctly but still feel crowded once your equipment is inside. Add your sleeping pads, air mattress, or camping cot, followed by sleeping bags, backpacks, and storage containers.
Make sure the mattress does not block the entrance, vents, or divider. Leave enough room to walk, change clothes, and organize gear. If someone must step over another person’s bed to leave at night, adjust the layout.
Families should plan where to place children’s gear, extra clothing, and lights. When camping with a dog, plan where to place the dog bed and water bowl without blocking the entrance or main walkway.
A tent’s stated capacity shows how many people it can accommodate, but not how comfortable it will feel once mattresses and gear are inside. Testing the layout at home helps you decide whether to bring less gear, rearrange the beds, or choose a larger tent.
Practice Taking the Tent Down and Repacking It
A complete practice setup includes taking the tent down and returning it to its bag.
Remove everything from inside and clear dirt, grass, and debris from the floor. Take down the guylines and stakes in reverse order, and place small parts directly into their storage bag.
For an inflatable tent, open the correct deflation valve and allow most of the air to escape. Then work from the far end toward the valve to push out the remaining air. Do not step on the valve or pull on the fabric to speed up deflation.
Use the storage bag's width as a guide when folding. It is common for a new tent not to fit on the first attempt. Adjust the folding direction rather than forcing the fabric, zippers, or bag.
If the tent becomes damp, unfold it and let it dry completely. Moisture may remain in the floor corners, seams, and guylines even when the surface feels dry.
Complete a Final Campsite and Weather Check
Review the forecast before leaving, especially rain, nighttime temperatures, and wind. These conditions will determine whether you need extra rain protection, stronger stakes, or additional guylines.
Confirm the campsite dimensions and ground type. A large tent needs room for the body, vestibule, and guylines. Hard soil or gravel may require different stakes from those included with the tent.
Make sure the tent is dry and that the pump, nozzles, poles, stakes, guylines, and repair supplies are packed. Keep spare stakes, a stake hammer, and basic repair materials somewhere easy to reach.
For an inflatable tent, test the pump before the trip. If it requires electricity, confirm that power is available or bring a suitable power source.

Choosing a Tent for Your First Camping Trip
For a first camping trip, choose a tent that is simple to set up, easy enough to carry, and roomy enough after adding a mattress and luggage. Choosing only by the stated capacity may leave the interior crowded.
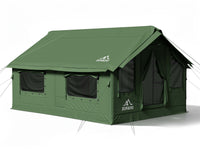
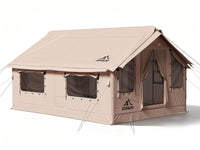
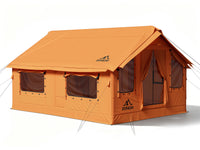
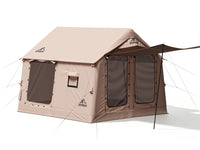
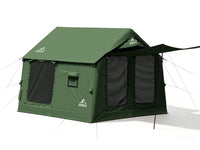
For couples, friends, or small families taking a short car-camping trip, the ZONKOO Lyra is a practical starting point. It accommodates 1–4 people, with the main setup taking 3 minutes, and weighs 29 pounds. Its 65-square-foot interior provides room for a mattress and luggage, while the 6-foot-10-inch height makes it easier to stand and move around inside.
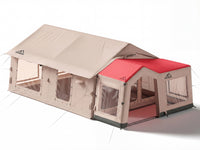
If you plan to bring more bedding and luggage or want additional room during rainy weather, consider the ZONKOO Orion. It accommodates 2–4 people and provides 86 square feet of interior space. The right choice depends on the setup process, packed weight, and interior space needed for the trip.
The right tent, combined with a full inspection and practice setup, helps new campers become familiar with setup, anchoring, interior organization, and repacking before leaving home. Solving missing-part, space, and setup issues in advance makes the first camping trip much easier.