For your first national park camping trip, it helps to follow a simple process: figure out what you need, narrow down campgrounds on the park’s official website, then use the reservation link provided there to check individual campsites and booking dates.
What matters is not just whether a site is available. A national park may have several campgrounds, and campsites within the same campground can vary in tent space, parking, shade, and distance from facilities. For your first National Park Camping trip, understanding these differences matters more than simply getting the most popular site.
Step 1: Decide What You Need From a Campsite
If you plan to drive into the park and camp in a designated campground, start by figuring out your group size, tent setup, vehicle needs, and basic facility requirements. This makes it easier to rule out sites that will not work for your trip.
Before you start searching, confirm:
- How many people will be staying
- How many tents you plan to set up
- The actual length and width of each tent when pitched
- How many vehicles need parking
- Whether you are bringing a large tent, camping furniture, or a lot of gear
- Whether you need drinking water, restrooms, or other basic facilities
- Whether you are bringing a pet, and what pet rules apply in the campground and surrounding areas
- Whether children, older adults, or anyone with limited mobility will need easier access to parking or facilities
It also helps to understand two basic terms: a campground is the larger camping area, while a campsite is the individual site where you stay and pitch your tent. Start by choosing the right campground, then narrow it down to a specific campsite.
Step 2: Use the National Park Website to Narrow Down Campgrounds
Once you reach the camping section of your destination park’s website, do not jump straight to individual campsites. A park may have several campgrounds with different operating seasons, locations, facilities, and camping options.
Check Whether the Campground Is Open for Your Dates
Not every national park campground is open year-round. Some operate only during certain seasons.
First, make sure the campground is open during your travel dates. Then check whether it offers tent camping and whether sites are reservable in advance or available on a first-come, first-served basis.
Make Sure the Location Works With Your Itinerary
Do not judge a campground only by how close it is to the park entrance. What matters more is how far it is from the trails and attractions you actually plan to visit.
In a large national park, campgrounds can be far apart. If you plan to start an early morning hike, staying closer to the trail area is often more convenient than camping near the entrance and making a long drive each day.
Focus on two questions:
- How long will it take to drive to your main trails and attractions?
- Does the campground fit naturally into your planned route?
If a campground adds a major detour or significantly increases your daily drive time, it may be better to rule it out.
Check Whether the Facilities Meet Your Needs
Once the location works, look at the campground’s basic facilities, including drinking water, restrooms, food storage, and trash disposal.
You do not need the campground with the most amenities. You only need the facilities that matter for your trip. A simple campground may be fine for one night, while convenient drinking water and restrooms become more important for a multi-night stay or a trip with children and more camping gear. If you also need showers, power, or other specific facilities, check whether the campground provides them.

Step 3: Choose the Right Campsite Within the Campground
Campsites within the same campground can have very different conditions. When choosing a specific site, first check the campsite type, then look at tent space, parking and gear access, and the site’s location within the campground.
Check the Campsite Type First
Open the individual campsite details and check the site type. A campsite may be listed as Tent Only, Standard, Group, RV, or Accessible.
Make sure the campsite type fits the way you plan to camp before looking at the other details.
Make Sure There Is Enough Space for Your Tent
If the listing provides the dimensions of the tent pad or designated setup area, compare them with the actual length and width of your tent when pitched.
Large family tents, cabin-style tents, and inflatable tents also need enough room for the entrance, stakes, and guy lines.
Once the dimensions work, check the campsite photos. Make sure the usable setup area is large enough and relatively level, without a major slope, tree roots, rocks, or other features taking up the space.
Check Parking and Gear Access
Find out whether the campsite is Drive-In or Walk-In.
At a Drive-In site, you can usually park at or near the campsite. At a Walk-In site, you will need to carry your gear from the parking area to your site.
If you are bringing a large tent, camping furniture, cots, food storage, and multiple gear bins, pay attention to the distance from the parking area to the tent site and whether there are slopes or steps along the way.
If you have a larger vehicle or more than one vehicle, also check the campsite’s vehicle count and length limits.
Use the Campground Map to Check the Surroundings
An individual campsite page shows you the site itself, while the campground map gives you a better sense of what is nearby.
Check whether the campsite is close to:
- Restrooms
- Main campground roads or entrances
- Water stations
- Trash disposal areas
- Other shared activity areas
Sites near these areas can be more convenient, but they may also have more foot traffic, vehicles, and noise. A site farther away may be quieter, but you may have a longer walk for water or restrooms.

Step 4: Understand the Booking Window
There is no single rule for how many months in advance national park campsites can be reserved. Booking windows and release schedules vary by campground, so once you choose a campground, check how its reservation system works.
If the campground uses Recreation.gov, you can find the booking dates and release rules on its listing. If it uses another reservation platform, follow the booking link provided on the national park website.
Check the Booking Window and Release Schedule
Some campgrounds release a block of future dates at once, while others use daily or weekly rolling releases. Some may also hold back a portion of campsites until closer to the arrival date.
Once you understand the system, note:
- When your arrival date becomes available to book
- What time reservations open
- Which time zone the release time uses
Prepare Backup Options for Popular Dates
If you plan to camp during summer, a holiday, or a popular weekend, do not wait until reservations open to start researching sites.
Prepare:
- One preferred campground
- Two or three acceptable campsites
- One backup campground
- A few alternate dates that could also work
If your first choice is unavailable, you can move directly to another option.
Book as Soon as Reservations Open
Log in to the reservation platform ahead of time. Once reservations open, start with the campsites you have already selected. If your first choice is unavailable, move to one of your backup sites.
Before completing the reservation, double-check the dates and campsite number.
Step 5: Do One Final Check Before Paying
Before payment, review the reservation details and any easy-to-miss campground rules. This helps prevent mistakes with dates, check-in requirements, or cancellation and modification policies.
National Park Camping Reservation Checklist
- Check-in and check-out dates are correct
- Group size is within the campsite limit
- Tent quantity and setup dimensions meet the campsite requirements
- The campsite’s parking setup works for your trip
- Vehicle quantity and size are within the limits
- Restrooms, drinking water, and other facilities meet your needs
- Food storage requirements have been reviewed
- Current fire restrictions have been checked
- Pet rules have been reviewed if you are bringing a pet
- Check-in and check-out times are confirmed
- Modification and cancellation policies have been reviewed
After reserving your campsite, also check whether the park requires a separate entrance pass, Timed Entry reservation, Vehicle Reservation, or other entry permit. A campground reservation does not always include these entry requirements.
Step 6: What If You Cannot Get a Campsite?
If your preferred dates are sold out, you do not necessarily need to change destinations right away. Keep watching for cancellations while also checking alternate dates and campgrounds.
Set an Availability Alert
Some campgrounds on Recreation.gov support Availability Alerts. If a matching campsite becomes available after someone cancels, you can receive a notification.
The alert does not hold the campsite for you. You still need to return to the reservation page and complete the booking.
Adjust Your Dates
If your schedule is flexible, check one or two days before or after your original dates, or look at weekdays instead. Friday, Saturday, and holiday weekend campsites are often harder to get.
Check Other Campgrounds in the Same Park
A sold-out popular campground does not mean the entire national park is full. Check other campgrounds in the park. If the additional drive time is reasonable and the campground still meets your basic needs, it can work as a backup.
Search Individual Nights for a Multi-Night Stay
If you cannot find one campsite available for your entire stay, search each night separately. Sometimes the issue is not that every night is full, but that no single campsite is available for the entire period.
If different sites are available on different nights, you may be able to move campsites during your stay. With a large tent, a lot of gear, or children, however, taking everything down and setting it up again can be a significant hassle.
Before booking multiple campsites, make sure each night can be reserved separately and check the time between checkout at the first site and check-in at the next.
Use First-Come, First-Served Sites as a Last Resort
Some campgrounds offer first-come, first-served sites during certain seasons, but arriving early does not guarantee a campsite.
Before relying on this option, check whether the campground actually offers first-come, first-served camping, how to confirm on-site availability, and where to register and pay. Procedures can vary by campground.
Until you have confirmed an available site, it is better not to rely on first-come, first-served camping as your only overnight plan.
Step 7: Choose a Tent That Fits the Campsite
Once your campsite is set, your tent should match the available space, your group size, and your camping needs.
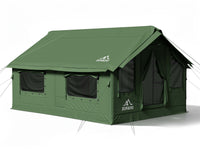
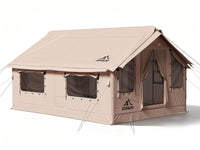
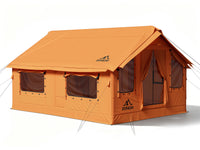
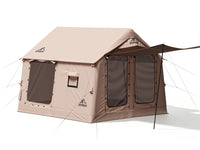
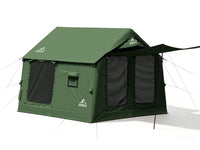
For a 1–2 person short trip or a campsite with a relatively compact setup area, the ZONKOO Lyra offers 65 sq ft of interior space for sleeping and basic gear storage, along with a roughly 3-minute inflation setup that keeps setup quick and simple.
For 2–4 campers, the Orion offers a balance between footprint and interior room. Its 86 sq ft interior leaves more space for beds, luggage, and everyday camping gear without requiring the footprint of a larger tent.
Families camping with children may prefer the Vega. Its 129 sq ft floor area and 7′1″ interior height provide more room for beds and gear while making it easier to stand, change clothes, and move around inside.
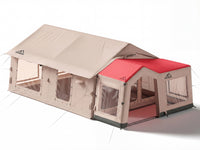
For larger families or groups, the Draco uses a two-room layout to create more separation between sleeping and gear areas. The Draco Plus adds a separate Gazebo that can be used for dining, relaxing, and setting up tables and chairs.
🏕️ Explore ZONKOO inflatable camping tents and find the right tent for your next national park camping trip.
For a First National Park Camping Trip, Fit Matters More Than Popularity
You do not need the most popular campground or campsite for a good first national park camping trip. What matters more is choosing a site that fits your itinerary, tent, vehicle, and actual camping needs.
Once your campsite is confirmed, save your reservation details, campground map, and important rules. Before you leave, check the park’s latest road conditions, weather, and campground updates so you are ready for the trip.