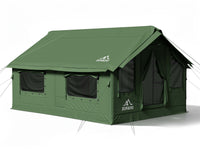
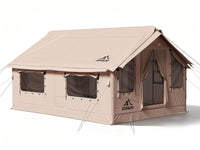
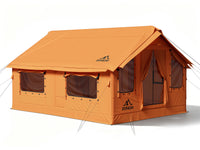
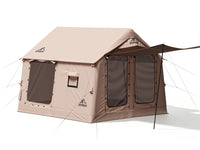
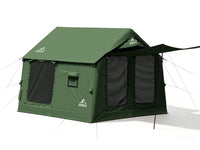
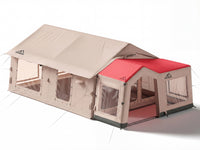
When using an inflatable tent in summer, the key to keeping the interior cooler is not adding more fans, but reducing heat buildup first and then keeping air moving. Whether the campsite has afternoon shade, whether the tent faces the breeze, and whether the canopy blocks any vents will directly affect the temperature inside.
Many inflatable camping tents have higher ceilings, nearly vertical sidewalls, and multiple doors, windows, or roof vents, which makes it easier to create airflow. However, these features only work well when the campsite and ventilation setup are properly planned.
It is also important to be clear that shade, ventilation, and fans can only improve comfort inside the tent. They cannot turn a tent into a safe place during extreme heat. If a heat warning is in effect, nighttime temperatures remain high, or someone experiences dizziness, nausea, weakness, or confusion, stop camping and move to a cool indoor space. Seek medical help when necessary.
Once the weather is suitable for camping, you can adjust the campsite, tent orientation, shade, and daily setup to keep the interior more comfortable.
Summer Inflatable Tent Quick Checklist
|
Item |
Better Option |
Avoid |
|
Campsite |
Afternoon shade and good airflow |
Full-day sun exposure |
|
Ground |
Dry grass or regular soil |
Sand, rocks, and dark hard surfaces |
|
Orientation |
Lower openings facing a light breeze |
Main door facing afternoon sun or strong wind |
|
Shade |
Leave an air gap between the canopy and tent roof |
Shade fabric touching the tent |
|
Ventilation |
Openings on both sides, with low intake and high exhaust |
Opening only one door |
|
Daytime Use |
Keep mesh panels and roof vents open |
Keeping the tent closed for long periods |
|
Air Beam Check |
Check for unusual tightness |
Adding more air after long sun exposure |
Choose a Cooler Campsite First
When choosing a campsite, do not judge it only by where the shade is when you arrive. A spot that is shaded in the morning may be fully exposed to the afternoon sun later. Before setting up, look at the direction of the sun, the position of nearby trees, and the shape of the surrounding terrain to estimate where the shade will move in the afternoon.
If you have to choose between morning shade and afternoon shade, it is better to prioritize afternoon shade. After the tent warms up during the morning, continued exposure to direct afternoon sun can cause heat to build up in the fabric, ground, and items inside.
Campsites near the edge of a wooded area or in a more open space are more likely to receive a natural breeze. Wind has difficulty moving through areas surrounded by tall shrubs, while ridgelines, hilltops, and fully exposed sites can experience stronger wind pressure and are not suitable choices just for better airflow.
Shade should also be safe. Before setting up, check for dead branches, loose limbs, or falling debris overhead, and do not place the tent directly against a tree trunk. Low-lying areas and sites with poor drainage should also be avoided because summer storms can cause water to collect, and nighttime moisture may be heavier.

Adjust the Tent Orientation for Sun and Wind
Once the campsite is selected, check which direction the doors and windows will face before inflating the tent. For inflatable tents, orientation affects not only access but also whether air can move through the entire tent.
When there is a steady light breeze, face a low side window or mesh door toward the wind, then open a door, window, or roof vent on the opposite side. Air needs a clear entry and exit point so it does not remain near the doorway.
The main door does not need to face directly into the wind. As wind speed increases, a large door can take more wind pressure and may also let in dust and leaves. A side window can be used for incoming air, while an opening on the leeward side or higher up can release heat.
Also pay attention to the side exposed to the afternoon sun. If the main door or large windows face direct western sunlight for long periods, that side can heat up quickly. You can adjust the tent angle so that a smaller side faces the sun or add separate shade on the western side.
When possible, set up in the morning or evening. Setting up at midday is not only more tiring, but the tent fabric and air beams will also continue heating up during inflation.
Do Not Block Ventilation When Adding Shade
Natural tree shade is the easiest way to reduce heat in summer. After confirming that the trees are safe, the canopy can help reduce direct sunlight on the tent roof and sidewalls.
If there is no suitable natural shade, use a canopy or a separate shade tarp. Prioritize covering the roof and the side exposed to the afternoon sun while leaving enough space around the tent for airflow.
Do not place the shade tarp directly against the tent. When the two layers touch, the heat absorbed by the tarp can still transfer to the tent, and the tarp may also press against skylights or roof vents. The canopy should sit slightly above the tent roof, with gaps on both sides so hot air can escape.
When setting up the canopy, make sure the doors, side windows, and skylights can still open normally. For inflatable family tents, the larger roof and sidewalls may need more shade, but the main air intakes and heat-release points should not be blocked just to create more coverage.
Large canopies should use separate poles, guy lines, and anchor points instead of being attached to the air beams or door frame. If gusty winds or thunderstorms are forecast, reduce the shaded area or take the canopy down.
Create Airflow Through the Doors, Windows, and Skylights
Opening only the main door often allows air to move near the entrance but not through the rest of the tent. A better approach is to open vents at different heights and on different sides so air can enter and leave freely.
A low window or mesh door on the windward side can serve as the air intake, while doors or windows on the leeward side release warm air. If the tent has skylights or roof vents, open them as needed to let hot air escape from the top.
For example, ZONKOO Orion and Vega have side windows and skylights at different heights. In summer, a shaded or windward-side window can bring in fresh air, while the skylight releases heat. Compared with opening only the main door, this layout helps air move more easily through the sleeping and living areas.
When the wind becomes stronger, reduce the opening on the windward side while keeping the leeward and upper vents open. This helps reduce wind pressure on the tent structure. During the day, open the shaded side wider. At night, adjust the openings based on temperature and wind, but do not close every vent.
A portable fan can be placed near a low air intake to pull outside air into the tent, or aimed toward the roof or exhaust opening to help warm air escape. The fan should support the existing airflow path rather than replace door and window ventilation.

Do Not Let Gear Block the Airflow Path
When the weather is stable and campsite conditions allow, you can close the outer tent door before leaving during the day while keeping mesh windows or covered roof openings open. This helps prevent the tent from becoming completely sealed under direct sunlight.
Do not pile sleeping bags, blankets, folding tables, and storage boxes near the windows. When using large tents such as the ZONKOO Draco and Draco Plus, place taller furniture and storage gear in the corners or toward the interior, leaving a clear airflow path between the main doors and windows.
The advantage of a spacious interior is not only that it holds more people and gear, but also that it makes it easier to separate sleeping, storage, and ventilation areas. When several people are resting inside, open the vents wider as needed to release heat and moisture.
Check Air Beam Pressure in Hot Weather
After the tent is inflated in the morning, the air inside the beams expands as the temperature rises, making them feel firmer than they did earlier. After long exposure to midday sun, check whether the beams feel unusually tight, show visible distortion, or have any problems around the valves.
Do not keep adding air just because the beams still have a little give in the morning. Follow the recommended pressure for the specific model and use a pump with a pressure gauge whenever possible.
As temperatures drop at night, the air beams may feel softer than they did during the day. This does not always mean there is a leak. Check the valves, inner bladder, and possible damage only if the beams continue to soften, the tent can no longer stand properly, or the pressure drops again soon after reinflation.
Do not leave the tent in direct sunlight for long periods when packing it away. Wait for the surface temperature to drop before deflating and folding it to better protect the fabric, coating, and connection points.
Further Reading: How to Inflate an Inflatable Tent: A Beginner’s Step-by-Step Guide
Learn more about the correct inflation steps, recommended pressure, and what to consider when adding or releasing air.
Plan for a More Comfortable Summer Camping Trip
Keeping a tent cool in summer does not depend on a single cooling device. It depends on how the campsite, shade, and ventilation work together. Choose a site with afternoon shade and good airflow, block heat from the roof and western side, and create airflow between lower doors or windows and upper openings to make the temperature inside easier to manage.
For families and groups, a spacious interior only becomes truly comfortable when air can move freely. Planning the tent orientation, shade placement, and gear layout can also make daytime rest and nighttime sleep more comfortable.
When preparing for your next summer camping trip, choosing an inflatable tent with the right space and ventilation design for the setting is also an important step toward a more comfortable campsite.
Explore the ZONKOO inflatable camping tent page. ⛺
Find a more comfortable option for your next summer camping trip. 🏕️