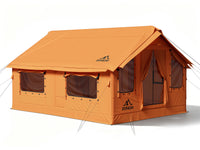
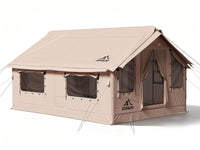
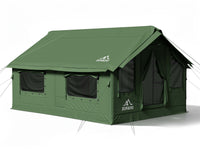
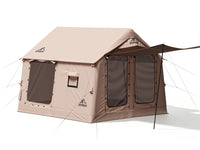
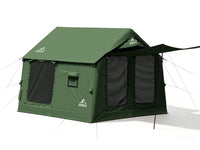
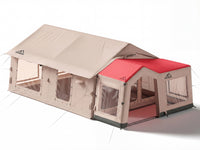
A large inflatable tent is mainly set up by unfolding the tent body, inflating the air beams, and securing the tent to the ground. Compared with a traditional pole tent, it eliminates the need to connect and thread tent poles. However, the larger the tent, the more important it is to plan the campsite, entrance direction, and guy-line space. Using ZONKOO large inflatable tents as examples, this guide explains the full setup process, from unfolding the tent to completing the final checks before moving in.
Step 1: Choose a Large, Level Campsite
Choose a level, firm area with good drainage, and remove branches, sharp rocks, and anything else that could damage the tent floor. If the ground is rough, lay down a groundsheet first to reduce direct contact with dirt and gravel and make cleanup easier after your trip.
A large inflatable tent needs more space than its floor dimensions alone. Opening the doors, moving in and out, placing stakes, and extending guy lines all require additional room around the tent. Tents with a vestibule or separate living area need even more space to fully open.
For example, when setting up the Draco Plus, you need to leave enough room not only for the main tent but also for the gazebo, entrance, and surrounding anchor points. If the main tent is already standing before you realize the gazebo is too close to a vehicle, tree, or neighboring campsite, repositioning the entire tent will be much more difficult.
Also check the slope, wind direction, and the path rainwater may take across the ground. Avoid low-lying areas, spots beneath dead branches, and locations exposed to constant strong winds.

Step 2: Confirm the Direction and Fully Unfold the Tent
Place the tent bag in the center of the campsite. Remove the tent and unfold it gradually along its original folds. Do not drag it long distances across rough ground, as rocks and branches may repeatedly rub against the tent floor.
Before inflating, decide which direction the main entrance, windows, and living area should face. Keep the entrance away from vehicles, trees, and the prevailing wind while leaving a clear path for people and gear. A large tent occupies more space after inflation and is difficult to move as a complete structure, so its direction should be confirmed at this stage.
Next, flatten the tent floor and unfold the corners, sidewalls, vestibule, and any other extension areas. Check whether large sections of the roof are still folded, whether any fabric is pressing against the air beams, and whether there is enough room to access the inflation valve.
If the tent body is not fully unfolded, one side may begin to rise while the other remains flat on the ground. Organizing the floor, air beams, and tent fabric before inflation reduces the need to stop the pump and readjust the structure later.

Step 3: Check the Valves and Connect the Pump
Before inflating, locate the inflation and deflation valves. Make sure the deflation valve is fully closed and that there is no dirt, debris, or folded fabric around the valves. Then check the air beams to ensure they are not twisted, folded, or trapped beneath another part of the tent. Otherwise, air may not flow evenly through the beams even if the pump is working properly.
Choose a nozzle that matches the tent valve and connect it securely. A standard air mattress pump may move air, but its nozzle, airflow, and pressure range may not be suitable for tent air beams. The pump must not only deliver air but also reach and accurately display the pressure required by the tent.
A manual pump does not require electricity and makes it easier to control pressure near the end of inflation. An electric pump is better suited to large air beams and reduces the physical effort of repeated pumping. When purchasing a ZONKOO large inflatable tent, you can choose a free electric air pump as a gift to make inflation easier. Whichever pump you use, confirm that the nozzle fits, the pressure display works correctly, and the required power source is available.
Do not leave the tent after starting the pump. Continue checking whether the nozzle has loosened and whether the air beams, door frame, and walls are rising in the correct direction. If the connection leaks, an air beam is compressed, or the tent rises unevenly, stop the pump and correct the problem before continuing.

Step 4: Lightly Secure the Tent and Inflate the Air Beams
In calm or light-wind conditions, you can organize the tent body before starting inflation. If there is noticeable wind, lightly stake down the windward side and several main corners first to prevent the large sections of tent fabric from moving during inflation.
Do not pull the corners to their final tension yet. The purpose of this initial staking is to hold the tent in position while leaving enough room for the floor, walls, and air beams to rise and adjust. Pulling the corners too tight may prevent the tent from opening naturally.
Connect the pump and begin inflating while watching the air beams, roof, sidewalls, and door frame to make sure they rise evenly. ZONKOO large inflatable tents should be inflated to 5.5 PSI. Stop inflating once the recommended pressure is reached. Do not continue increasing the pressure just to make the tent look firmer.
If one side rises more slowly, stop the pump and check whether an air beam is compressed, the roof is still folded, or a corner is restricting movement of the tent floor. If the pressure is correct but the tent still looks uneven, adjust the way the tent is unfolded instead of adding more pressure.
If the wind causes the unfolded fabric to flap continuously, or if one person cannot control the partially inflated tent, stop the setup process. Two people will be safer in these conditions, with one person operating the pump and the other monitoring the air beams and arranging the tent fabric.
Further Reading: How to Inflate an Inflatable Tent: A Beginner’s Step-by-Step Guide

Step 5: Straighten the Tent and Open the Full Structure
Once the air beams reach the recommended pressure, the tent will have its main support structure, but the large tent body may still need further adjustment.
Gently push the air beams and walls from outside to help the structure stand upright, then smooth out folds in the roof and sidewalls. Check that the door frame is straight, the main tent is not leaning to one side, and the internal rooms and main walkways have taken their proper shape.
If the large inflatable tent includes a vestibule, porch, or separate living area, organize these sections after the main tent is stable so that the extensions do not pull against the main walls.
Make adjustments gradually along the air beams and walls rather than pulling hard on one area. Once the tent is inflated, do not drag the entire structure, as this may damage the floor or place additional stress on connection points.

Step 6: Secure the Stakes and Tighten the Guy Lines
Once the tent body is properly positioned, check that the floor is flat before completing the final staking.
Start by adjusting the main corners, then secure the sides, entrance, vestibule, and extension areas. Do not overtighten the tent floor just to make the fabric look more taut. Excess tension may pull the door frame, sidewalls, and air beams out of alignment.
The stakes should also match the campsite surface. Grass, hard soil, gravel, and sand provide different levels of grip. When necessary, use stakes designed for the specific ground conditions rather than relying on one type for every campsite.
After securing the stakes, extend the guy lines away from the tent while keeping them clear of the entrance and main walking paths. Adjust the tension gradually so that all sides are supported evenly. Do not tighten only the windward side or place excessive tension on a single guy line.
The air beams support the tent body, while the stakes and guy lines control the tent’s position and distribute external forces. A large tent is not fully set up if it has only been inflated without being properly secured.

Step 7: Complete the Final Checks Before Moving In
Walk around the tent and inspect the entire structure. Check that the roof and walls are properly positioned, the air beams are even, and the inflation and deflation valves are fully closed and locked.
Open and close the doors and windows to confirm that the door frame is not distorted and that the zippers move smoothly. Check that the floor is flat, the main corner and side stakes are secure, and the guy lines are evenly tensioned. For a large inflatable tent with a vestibule or separate living area, such as the Draco Plus, confirm that each section is fully open and that entrances and main walkways are not blocked by ropes or gear.
The total setup time for a large inflatable tent includes more than the time the pump is running. It also includes choosing the campsite, confirming the direction, unfolding the tent, arranging the structure, securing the stakes, and adjusting the guy lines. The first setup may take longer while you become familiar with the tent, but the process will become smoother after a practice setup.

Why Won’t an Inflatable Tent Stand Up After Inflation?
A large inflatable tent may fail to stand properly because of insufficient pressure, an open valve, a compressed air beam, or anchor points that were tightened too early.
First, check the pump and pressure. Make sure the nozzle is secure, the pump did not stop too early, and the air beams have reached the recommended inflation pressure.
Next, check the inflation and deflation valves. Confirm that they are fully closed and locked and that there is no continuous air leak around the connection.
Then check whether any air beam is compressed or twisted, and smooth out any remaining folds in the roof and sidewalls. If the pressure is correct but part of the structure still does not rise, remove any fabric restricting the air beam.
Finally, check whether the stakes or guy lines were tightened too early. If the anchor points restrict movement of the tent floor, the tent may not form the correct shape even when the air pressure is sufficient.
If an air beam becomes noticeably soft again shortly after reinflation, or one beam feels significantly different from the others, inspect the valve and air beam more closely instead of repeatedly increasing the pressure.
Make Setting Up a Large Inflatable Tent Easier
A large inflatable tent will stand properly only when the campsite, direction, tent layout, and securing sequence are handled correctly. Organizing the structure before completing inflation and ground anchoring helps prevent compressed air beams, uneven walls, and repeated adjustments.
Before using the tent for the first time, set it up once in a yard or open area to become familiar with the valves, entrance, and anchor points. This will make campsite setup more manageable and leave more time for organizing gear and enjoying the rest of the trip.